Madganser Woodworking
Our Blog
Our Blog
An ongoing series of informational entries
An ongoing series of informational entries
Old Wood - July 10, 2021
Old Wood - July 10, 2021
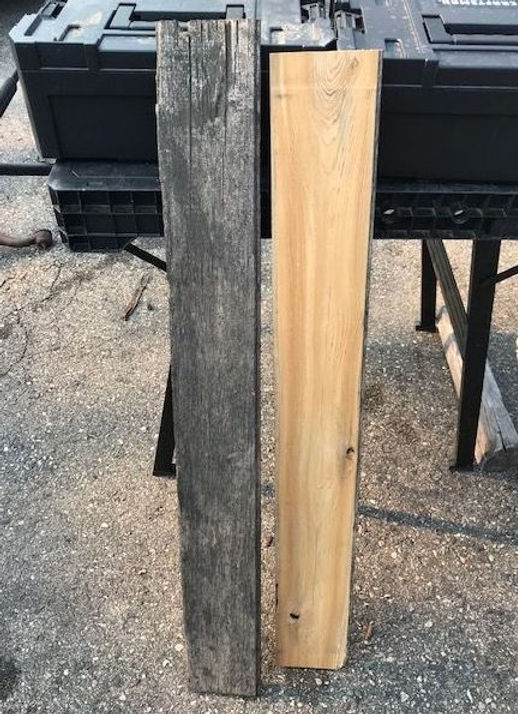
We are all aware of tv shows like "Barnwood Builders". A few days ago, I received a call to come look at a pile of boards to see if the person could somehow save some from a 15 year old pile that sat uncovered outside. I will admit that I didn't expect much when I looked at the boards. I did take two boards that looked like kindling wood with me to see how bad they really were. Turns out, they were in way better shape than I expected. The edges have some rot, but the core is still sound. With some table saw work and planing, these boards can be reused, just like you see on tv.
I only bring this up because these boards are in worse shape than the ones in the programs. These boards will now be used to side one wall in the person's living room, after debugging, of course. It's calls like that, that make my day. I love seeing old wood come back to life. These boards are pine and planing them brought the color back out, along with the smell. Gotta love that! But my favorites are still Maple and Oak.

Mistakes With Epoxy
Mistakes With Epoxy
There are many mistakes when working with epoxy. Here are 7 of the most common. *I can actually think of 9 right off the top of my head.*
• Too Big, Too Soon
Start small. There is a learning curve, so go simple.
• Choosing the Wrong Epoxy
Rockler.com provides an online guide explaining all the epoxies they carry and what each epoxy is best suited for.
• Your Form or Mold Wasn’t Built, Sealed, or Leveled Properly
Make sure to properly seal all edges with Construction Seaming Tape. This can be found at most hardware stores. After taping, silicone all edges. Although thick, epoxy will run like water. If all edges of mold are not sealed, you will have a large sticky mess that is almost impossible to clean up. If you are filling a void or sealing an object or wood within the epoxy, make sure to seal it with its own coat first. Failure to do so causes bubbles to rise from the items microscopic rough surface, and you will get bubbles throughout your project. Last, make sure your project is level and properly supported throughout the whole process. An unlevel or weak support underneath your mold will result in one side being thicker than the other side.
• Temperature
Your epoxy or shop can be too hot or cold. Epoxy works best at 70°-80°. Use air conditioning or heating to provide a consistent and constant temperature. Both need to be at the correct temperature before you start to mix and pour.
• Wrong Amount of Epoxy
Take the time to figure out the exact amount of epoxy needed. Too little, and you must duplicate the prior batch exactly. Failure means a different layer of color. Too much means that you are wasting supplies and money. Do make a little extra based on your calculation. MAS Epoxies has an online calculator to assist you in making the right amount every time.
• Over Mixing
Mixing too long or fast causes more than the ordinary bubbles observed in mixing. The epoxy normally becomes a little foggy while mixing. Rapid mixing causes micro-bubbles to form. Epoxy becomes super cloudy and cannot be fixed. No amount of heat will get all the bubbles out. Use a stir stick, slow and steady. Scrape the sides and bottom of mixing container to guarantee complete mixture. If your project is big and you decide to use a mixing paddle on your drill, go SLOW AND STEADY.
• Rushing Your Final Surface Prep and Finishing
Just like all woodworking (or any job), your finish is what everyone will see. You can spend hours creating a great product, only to make it look like junk. With epoxy, go slow. Start with 60-80 grit and work your way up to 600 grit. The final sand should be a wet sand. Do not skip the different grits. With epoxy, everything is slow.